A STEP-BY-STEP GUIDE
Building your own fossil collection is an exciting journey into the past, offering a tangible connection to the Earth’s history. Whether you’re a budding paleontologist or a curious hobbyist, starting a fossil collection can be both educational and immensely rewarding. Here’s a comprehensive guide to help you embark on this prehistoric adventure.
1. Understanding fossils: what are they ?
Before you begin collecting, it’s essential to understand what fossils are. Fossils are the preserved remains or traces of ancient organisms, typically embedded in rock. They can range from bones and teeth to imprints of plants and shells. These remnants provide invaluable insights into life millions of years ago.
2. Getting started: basic requirements
Tools and equipment
To start your fossil-hunting journey, you’ll need some basic tools:
- Geological hammer: For breaking rocks to reveal fossils.
- Chisel: Useful for delicate extraction.
- Brushes: To clean off dirt and debris.
- Field notebook: To record the location and details of your finds.
- Magnifying glass: For examining small specimens.
- Protective gear: Safety goggles and gloves to protect yourself while working.
Research and Permits
Not all land is open for fossil hunting. Research local regulations and obtain any necessary permits. Public lands, certain parks, and designated fossil-hunting sites are often accessible, but private land requires permission from the owner.
3. Types of fossils and where to find them
Different types of fossils can be found in various parts of the world. Here are some common types of fossils and the countries where they are typically found:
Dinosaurs
- United States: States like Montana, Wyoming, and Utah are rich in dinosaur fossils, particularly from the Jurassic and Cretaceous periods.
- France: The Jurassic and Cretaceous periods have left behind significant dinosaur fossils in regions like the Dordogne and Provence.
- Spain: The Iberian Peninsula is known for its rich deposits of dinosaur fossils, especially in the regions of La Rioja and Teruel.
- Portugal: The Lourinhã region is famous for its Jurassic dinosaur fossils.
Plant fossils
- United States: The Florissant Fossil Beds in Colorado are renowned for their Eocene plant fossils and the Mazon Creek fossil deposit in Illinois for their Carboniferous plant fossils.
- Australia: The Glossopteris fossils found in Permian rocks are well-known.
- Canada: Fossilized plants are common in the coal beds of Nova Scotia.
- Germany: The petrified forests in Saxony-Anhalt and the coal deposits of the Ruhr area contain significant plant fossils.
- United Kingdom: Fossilized plants can be found in the coal measures of Scotland and Wales.
Mammal fossils
- United States: The La Brea Tar Pits in California are a significant site for Pleistocene mammal fossils.
- France: The Quercy Phosphorites region is famous for its Eocene and Oligocene mammal fossils.
- Germany: The Messel Pit near Frankfurt is renowned for its exceptionally well-preserved Eocene mammal fossils.
- Spain: The Los Rincones site in Teruel contains mammal fossils from the Miocene epoch.
Amber with inclusions
- Baltic Region (Poland, Russia, Lithuania): Known for amber that often contains prehistoric insects and plants.
- Dominican Republic: Famous for amber with a wide variety of inclusions, offering insights into ancient ecosystems.
- Myanmar: Noted for Cretaceous amber that contains numerous well-preserved insects, plants, and even small vertebrates.
Marine invertebrate Fossils (ammonites, bivalves and other molluscs)
- United Kingdom: The Jurassic Coast in Dorset is famous for its abundance of marine fossils from the Jurassic period.
- Germany: The Solnhofen limestone is renowned for its exceptionally well-preserved marine fossils, including the Archaeopteryx.
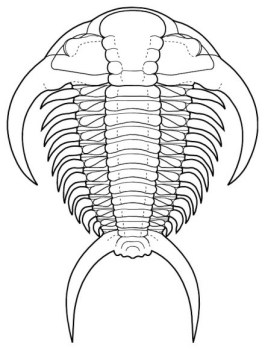
- Morocco: Known for Devonian and Cretaceous marine fossils, including trilobites and ammonites.
- France: The Paris Basin is notable for its abundance of invertebrate fossils, especially from the Jurassic and Cretaceous periods.
- Belgium: The Mons Basin is rich in marine fossils, particularly from the Cretaceous period.
- Switzerland: The Jura Mountains are known for their Jurassic marine fossils.
- Sweden: The island of Gotland is famous for its Silurian invertebrate fossils.
- Poland: The Holy Cross Mountains are rich in marine fossils, especially trilobites and brachiopods from the Cambrian and Ordovician periods.
By focusing on these regions and types of fossils, you can develop a diverse and impressive fossil collection while respecting the restrictions in place.
4. Choosing the right locations
Fossil-rich sites
Certain areas are renowned for their fossil deposits. Some famous sites include:
- Coastal cliffs: Places like the Jurassic Coast in England, Normandy and Boulonnais coasts in France.
- Deserts: In Morocco, the Sahara Desert around Erfoud in Morocco is famous for invertebrate fossils such as ammonites and trilobites.
- Riverbanks and creek beds:
- Fields:
- Quarries: Often rich in various fossil types, always ask for permission and safety before
Local clubs and museums
Joining a local fossil or geology club can provide valuable guidance and access to group trips. Museums often have resources and may even host fossil-hunting excursions.
5. Techniques for finding fossils
Using geological maps
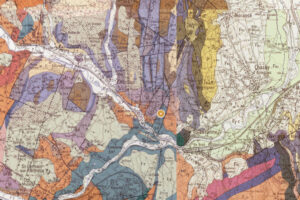
Geological maps are invaluable tools for fossil hunters. These maps depict the distribution and type of rocks at the Earth’s surface, which helps in locating fossil-rich formations. Here’s how to effectively use both physical and online geological maps:
Paper geological maps
- Acquire maps: Obtain geological maps from geological survey offices, universities, or specialized bookstores. These maps typically show different rock types, geological formations, and their ages.
- Understand symbols and colours: Learn to read the map’s legend. Colors and symbols indicate different rock types and ages, which can help you identify potential fossil-bearing formations.
- Identify target areas: Look for areas on the map where sedimentary rocks (like shale, limestone, and sandstone) are exposed, as these are most likely to contain fossils.
- Cross-reference with field guides: Use field guides to correlate map information with known fossil locations, enhancing your chances of finding fossils.
Online geological maps
- Access online resources: Use online geological map services such as the United States Geological Survey (USGS) National Map Viewer, the French (BRGM) InfoTerre, the British Geological Survey’s Geology Viewer, the Switzerland Geological Atlas , the German BGR Geoportal or similar resources in your country.
- Interactive features: Utilize interactive features to zoom in on specific areas, adjust layers to view different geological aspects, and identify rock types and formations.
- Overlay historical data: Many online maps allow you to overlay historical data, showing previous fossil finds and geological surveys, which can point you to promising locations.
- GPS integration: Some online maps integrate with GPS devices or mobile apps, enabling you to navigate directly to the areas of interest in the field.
Surface collecting
This is the simplest method, involving walking through a site and visually inspecting the ground for fossils. Many fossils can be found just lying on the surface, especially in areas with little vegetation.
Splitting rocks
Sedimentary rocks, like shale and limestone, often contain fossils. Carefully split these rocks with a hammer and chisel, looking for fossils on the exposed surfaces.
Excavation
For more serious collectors, excavation can yield significant finds. This method requires more time, effort, and knowledge but can uncover incredible specimens.
6. Buying fine fossils
Research and knowledge
Before purchasing fossils, it’s crucial to educate yourself. Understanding the types of fossils you are interested in and their typical market value can prevent you from making costly mistakes. Books, online resources, and consulting with experts can provide valuable information.
Reputable dealers
Always buy from reputable dealers who provide detailed information about the fossil’s provenance and authenticity. Look for dealers who are members of recognized professional associations, such as the Association of Applied Paleontological Sciences (AAPS).
Authentication and documentation
When purchasing a fossil, ensure it comes with proper documentation, including information about its origin, age, and species. Authenticity certificates are sometimes provided, especially for high-value fossils. If possible, have the fossil independently verified by an expert.
Online marketplaces
Online platforms, specialized auction houses, and websites dedicated to fossils can be good sources, but they require careful vetting. Check seller ratings, reviews, and return policies. Always ask for detailed photographs and information before making a purchase.
Auctions and shows
Fossil and mineral shows, as well as auctions, are excellent places to find high-quality fossils. These events often feature reputable dealers and provide opportunities to see and handle specimens before buying. They also offer a chance to network with other collectors and experts.
Budget and investment
Set a budget for your fossil purchases and stick to it. While some fossils can be expensive, there are also many affordable options available. Consider fossils as both a hobby and an investment. High-quality, rare specimens can appreciate in value over time.
7. Identifying and documenting your finds
Identification
Once you’ve collected fossils, identifying them is crucial. Use field guides, online resources, and consult with experts to determine the species and age of your fossils.
Documentation
Record the details of each find in your field notebook:
- Location: GPS coordinates or detailed description.
- Date: When you found the fossil.
- Rock formation: The type of rock and its geological age.
- Description: Detailed notes and sketches or photographs of the fossil.
8. Cleaning and preserving fossils
Preparing
Preparing fossils is a crucial step to showcase their details and ensure they last. Here’s a simple guide for beginners:
What you can do
- Basic mechanical cleaning
- Small chisels and hammers: For removing larger chunks of matrix.
- Airscribes: These are small, pneumatic tools that provide precise control and are used to gently remove the matrix around fossils.
- Basic repair
- Adhesives: If a fossil breaks, you can use a small amount of super glue to fix the pieces back together.
What to avoid
- Avoid chemicals: Do not use vinegar or strong acids on your fossils.
- Avoid rushing: Take your time when cleaning and handling fossils to avoid accidental damage.
- Avoid using improper tools: Stick to soft brushes and simple tools; avoid heavy or sharp tools that can break the fossil.
Getting help
- Ask experts: If you’re unsure about how to handle a fossil, seek advice from a local museum, university, or fossil club.
- Use resources: Books and online tutorials can provide helpful information and techniques.
- Consider professional help: For valuable or very delicate fossils, consider having a professional preparator clean and preserve them.
By following these guidelines, you can safely and effectively prepare your fossils, ensuring they are preserved and ready for display or study.
Labeling and storage
Store your fossils in a dry, stable environment. Use padded containers or display cases to protect them from damage. For valuable or fragile specimens, consider consulting a professional conservator. Record details like the fossil’s identification, location, and date of discovery.
9. Sharing and expanding your collection
Display
Displaying your fossils can be as simple or elaborate as you like. Shadow boxes, shelves, and custom display cases are all excellent options.
Sharing knowledge
Sharing your collection and knowledge with others can enhance your experience. Participate in local events, give talks, or join online forums to connect with other enthusiasts.
Continual learning
Fossil hunting is a continually evolving field. Stay informed about new discoveries and techniques by reading scientific journals, attending conferences, and taking courses.
Conclusion
Building a fossil collection is a journey through time that offers endless opportunities for discovery and learning. With the right tools, knowledge, and a bit of patience, you can uncover the secrets of the Earth’s ancient past and develop a collection that is both scientifically valuable and personally meaningful. So grab your gear and start exploring — the world of fossils awaits !